
| 일 | 월 | 화 | 수 | 목 | 금 | 토 |
|---|---|---|---|---|---|---|
| 1 | 2 | 3 | 4 | |||
| 5 | 6 | 7 | 8 | 9 | 10 | 11 |
| 12 | 13 | 14 | 15 | 16 | 17 | 18 |
| 19 | 20 | 21 | 22 | 23 | 24 | 25 |
| 26 | 27 | 28 | 29 | 30 | 31 |
- 25가지 효율적인 sql작성법
- Login with OAuth Authentication
- Validations
- 자바
- 전체
- 전체텍스트
- 단축키
- IBatis procedure
- 다형성
- jquery
- 로또
- angular2
- 추상클래스
- 페이징
- while
- 업캐스팅
- 다운캐스팅
- 가변인자
- Full text
- 상속예제
- 상속
- 전자정부
- full text indexing
- 스프링
- Random
- 자바 야구게임
- 이클립스
- 야구게임
- 형변환
- Today
- Total
nalaolla
Spring Cloud MSA(1) – Configuration server 구성 본문
과거에 분산시스템이란 개인이 접근할 수 없는 전문적인 분야로, 복잡하고 정교한 시스템으로 구성되어 있어 개인 개발자 혼자 구축하거나 운영할 수 없는 영역이었습니다. 그러나 Spring Cloud가 나오면서 가장 보편적인 분산 시스템 패턴에 대하여 간단하고 접근 가능한 프로그래밍 모델을 제공하게 되었고. 개발자가 복원력 있고 안정적인 분산 시스템을 구축할 수 있게 되었습니다. Spring Cloud는 Spring Boot 위에 구축되므로 기존의 Boot 개발자가 손쉽게 접근하여 시작하고 생산성을 높일 수 있게 되었습니다.
각설하고, Spring Cloud는 다음과 같은 Feature로 구성되어 있습니다.
Configuration Server
시스템의 환경 설정을 중앙화 하고 실시간으로 설정을 변경하고 전파하는 기능을 제공합니다..
API Gateway
다양한 서비스를 사용하는 클라이언트에게 단일 경로의 api 엔드포인트를 제공하여 백단 서비스를 통합할 수 있도록 지원합니다.
Service Discovery
가용한 서비스 인스턴스들의 위치 정보들을 동적으로 등록하고 클라이언트에게 제공하여 유연한 시스템 관리 및 확장을 지원 합니다.
Load Balancing
클라이언트 로드밸런싱을 지원합니다.
Circuit Breakers
Gateway에 적용하여 서비스 장애시 계단식 오류로부터 서비스를 보호하고 대체 응답을 제공할 수 있는 기능을 제공합니다.
Configuration Server
분산 시스템에서 사용되는 환경설정을 Configuration서버에서 관리할 수 있도록 환경을 제공합니다. 각각의 시스템에 중복으로 존재했던 설정들을 Configuraion 서버에서 일원화 하여 체계적으로 관리 할수 있으며 무중단으로 설정 변경 가능하여 기존처럼 설정이 변경될때마다 연관된 시스템의 배포가 필요 없게 됩니다. 또한 DB 접속정보나 패스워드같은 민감한 정보들을 서비스 프로젝트에 노출시킬 필요가 없어 보안에 대한 부분도 개선할 수 있습니다.
실습에서는 Configuration서버를 구축하고 2개의 SpringBoot Instance가 서버의 설정값을 사용하도록 구축할 것입니다. Configuration 서버에서 환경 설정 파일을 관리하는 방법은 로컬파일, Git, Database등이 있는데 실습에서는 로컬파일과 Git으로 관리하는 방법을 사용해 보겠습니다.

build.gradle
라이브러리는 org.springframework.cloud:spring-cloud-config-server 를 사용합니다.
|
plugins { id 'org.springframework.boot' version '2.1.4.RELEASE' id 'java' }
apply plugin: 'io.spring.dependency-management'
group = 'com.spring' version = '0.0.1-SNAPSHOT' sourceCompatibility = '1.8'
repositories { mavenCentral() }
ext { set('springCloudVersion', 'Greenwich.SR1') }
dependencies { implementation 'org.springframework.cloud:spring-cloud-config-server' }
dependencyManagement { imports { mavenBom "org.springframework.cloud:spring-cloud-dependencies:${springCloudVersion}" } } |
Application 설정
@EnableConfigServer를 선언하여 ConfigServer를 활성화 합니다.
|
package com.spring.msa;
import org.springframework.boot.SpringApplication; import org.springframework.boot.autoconfigure.SpringBootApplication; import org.springframework.cloud.config.server.EnableConfigServer;
@EnableConfigServer @SpringBootApplication public class ConfigurationApplication { public static void main(String[] args) { SpringApplication.run(ConfigurationApplication.class, args); } } |
bootstrap 작성
/resources 아래에 application.properties를 삭제하고 bootstrap.yml을 생성합니다.
공통 환경설정
|
# bootstrap.yml 공통 환경설정 파일. 기본 프로파일은 native,local로 지정 server: port: 9000 spring: profiles: active: native,local |
local 환경설정 – 로컬 환경설정 파일을 사용하는 방법
local 환경에서 서비스별 설정 파일이 위치할 장소는 아래 내용중 ${user.home}에 위치한 디렉터리 하위 입니다. 윈도우즈에서 호출시는 file:///로 /가 한번 더 붙습니다. 프로젝트 내 /resources 하위로 설정해도 되지만 이렇게 하면 설정 변경시 configuration 서버를 리스타트 해야 반영됩니다.
|
# bootstrap-local.yml 로컬 환경설정 파일 spring: profile: local cloud: config: server: native: # 서버 실행시 profile 설정시 native를 지정해야 적용됩니다. search-locations: file:///${user.home}/server-configs # window - C:\Users\계정명\server-configs #search-locations: file://${user.home}/server-configs # mac, linux #search-locations: classpath:/server-configs |
서비스별 환경 설정 추가
위에서 지정한 file:///${user.home}/server-configs 디렉터리를 로컬 pc에 생성하고 {서비스이름}-{환경profile}.yml 형태로 환경설정 파일을 작성합니다. 아래는 제 Mac에 세팅한 내용입니다. member-service-local.yml, contents-service-local.yml 두개의 파일을 작성하였습니다.
|
$ pwd /Users/happydaddy/server-configs $ ls member-service-local.yml contents-service-local.yml |
|
# member-service-local.yml spring: profiles: local message: Hello Spring MemberService Local Server!!!!!
# contents-service-local.yml spring: profiles: local message: Hello Spring ContentsService Local Server!!!!! |
환경설정 확인
Config Server를 실행하고 콘솔에서 다음과 같이 실행하여 설정값을 확인합니다. 다음의 주소를 호출하면 member-service, contents-service에 대한 설정이 어떻게 세팅되었는지 확인 가능합니다.
http://{config서버주소}/{확인할서비스이름}/{환경profile}
|
$ curl http://localhost:9000/member-service/local { "name": "member-service", "profiles": [ "local" ], "label": null, "version": null, "state": null, "propertySources": [ { "name": "file:///Users/happydaddy/server-configs/member-service-local.ym", "source": { "server.port": 8080, "spring.profiles": "local", "spring.message": "Hello Spring MemberService Local Server!!!!!" } } ] } $ curl http://localhost:9000/contents-service/local { "name": "contents-service", "profiles": [ "local" ], "label": null, "version": null, "state": null, "propertySources": [ { "name": "file:///Users/happydaddy/server-configs/contents-service-local.ym", "source": { "server.port": 8081, "spring.profiles": "local", "spring.message": "Hello Spring ContentsService Local Server!!!!!" } } ] } |
Client Service Service 만들기
Configuration 서버를 구성했으므로 해당 설정을 사용할 서버를 2개 더 만듭니다. 각각 member-service, contents-service로 어플리케이션 이름을 설정할 것입니다. 아래와 같이 2개의 Boot 프로젝트를 생성하고 각각 8080, 8081 포트로 서버를 실행하여 테스트를 진행합니다.
build.gradle
두개 서비스 동일하게 설정합니다. spring-cloud-starter-config는 config서버와 통신을 하기 위한 라이브러리입니다.
|
plugins { id 'org.springframework.boot' version '2.1.4.RELEASE' id 'java' }
apply plugin: 'io.spring.dependency-management'
group = 'com.spring' version = '0.0.1-SNAPSHOT' sourceCompatibility = '1.8'
repositories { mavenCentral() }
ext { set('springCloudVersion', 'Greenwich.SR1') }
dependencies { implementation 'org.springframework.boot:spring-boot-starter-web' implementation 'org.springframework.cloud:spring-cloud-starter-config' implementation 'org.springframework.boot:spring-boot-starter-actuator' }
dependencyManagement { imports { mavenBom "org.springframework.cloud:spring-cloud-dependencies:${springCloudVersion}" } } |
bootstrap 작성
Configuration서버와 동일하게 application.properties를 삭제하고 bootstrap.yml을 작성합니다.
공통 환경설정
application.name은 config서버에서 설정값을 조회할때 구분하기 위한 서비스이름입니다.
management.endpoint.web.exposure.include: refresh 설정은 클라이언트 서버의 /actuator/refresh endpoint를 활성화 하기 위한 설정입니다. Config 서버에서 환경설정을 변경할경우 클라이언트 서버에는 설정이 바로 적용되지 않습니다. 클라우드에서는 변경사항을 적용하려면 클라이언트 서버로 refresh 요청을 POST로 호출해 주어야 변경되도록 설계 되어있습니다. 변경된 설정을 다시 로드하는 테스트는 아래에서 진행해 보겠습니다.
bootstrap.yml
|
# member-service server: port: 8080 spring: profiles: active: local application: name: member-service management: endpoints: web: exposure: include: info, refresh # contents-service server: port: 8081 spring: profiles: active: local application: name: contents-service management: endpoints: web: exposure: include: info, refresh |
local 환경설정
서버의 환경 설정은 Config 서버에서 받아와야 하므로 Config 서버의 주소를 명시 합니다. fail-fast:true는 클라이언트 서버를 시작할때 Config 서버에서 정보를 로드할수 없을경우엔 서버를 실행하지 않겠다는 설정입니다.
|
# member-service bootstrap-local.yml spring: profiles: local cloud: config: uri: http://localhost:9000 fail-fast: true
# contents-service bootstrap-local.yml spring: profiles: local cloud: config: uri: http://localhost:9000 fail-fast: true |
Application 설정
일반적인 boot서버와 동일하고 추가되는 설정은 없습니다.
|
// member-service @SpringBootApplication public class MemberApplication { public static void main(String[] args) { SpringApplication.run(MemberApplication.class, args); } } // contents-service @SpringBootApplication public class ContentsApplication { public static void main(String[] args) { SpringApplication.run(ContentsApplication.class, args); } } |
Controller 작성
Config 서버에서 환경 설정 내용을 불러올수 있는지 확인을 위한 코드를 작성합니다. 여기서 중요한 점은 Controller선언시 @RefreshScope도 같이 선언해 줘야 한다는것입니다. 일반적인 환경설정은 서버가 스타트 될때 한번 로드되고 캐싱되어 변하지가 않습니다. Config 서버를 통해 외부에서 환경설정이 변경되었을때 해당 설정이 다시 로드 되어야 하는 부분은 코드상에 어노테이션으로 표시를 해주어야 합니다.
|
# member-service @RestController @RequestMapping("/v1") @RefreshScope public class MemberController {
@Value("${server.port}") private int port;
@Value("${spring.message}") private String message;
@GetMapping("/member/detail") public String member() { return "Member Detail - Port " + port + " - " + message; } } |
|
# contents-service @RestController @RequestMapping("/v1") @RefreshScope public class ContentsController {
@Value("${server.port}") private int port;
@Value("${spring.message}") private String message;
@GetMapping("/contents/detail") public String contents() { return "Contents Detail - Port " + port + " - " + message; } } |
Test
Config Server(port 9000)을 실행하고. boot 서버 두대를 차례로 실행합니다.(port 8080,8081)
서버 스타트시 로그를 보면 Config 서버에서 설정값을 가져오는 것을 확인할 수 있습니다.
|
2019-05-27 00:09:33.384 INFO 10220 --- [ main] c.c.c.ConfigServicePropertySourceLocator : Fetching config from server at : http://localhost:9000 2019-05-27 00:09:36.596 INFO 10220 --- [ main] c.c.c.ConfigServicePropertySourceLocator : Located environment: name=contents-service, profiles=[local], label=null, version=null, state=null |
console에서 8080, 8081서버를 차례로 호출해 봅니다.
결과를 보면 Configuration 서버의 설정값으로 결과가 출력되는 것을 확인 할 수 있습니다!
|
$ curl http://localhost:8080/v1/member/detail Member Detail - Port 8080 - Hello Spring MemberService Local Server!!!!! $ curl http://localhost:8081/v1/contents/detail Contents Detail - Port 8081 - Hello Spring ContentsService Local Server!!!!! |
Alpha 서버 환경 테스트
local서버는 local 환경의 파일을 읽어 설정 값을 가져왔다면. alpha서버는 github에 설정된 값을 이용하도록 실습해 보겠습니다.
config 서버 alpha 설정 추가
알파환경으로 서버를 띄울경우 github의 특정 디렉터리 하위의 파일을 읽도록 설정합니다. 실습에서는 공개된 Gihub Repository를 사용하여 인증이 필요없지만 비공개 Repository를 사용할경우 아래 설정에 인증 내용도 추가해야 합니다. 실습은 인증 없이 진행합니다.
|
# bootstrap-alpha.yml spring: profile: alpha cloud: config: server: git: uri: https://github.com/codej99/SpringCloudMsa search-paths: server-configs |
GitHub에 설정 추가
github에서 content-service-alpha.yml, member-service-alpha.yml 두개를 생성하고 커밋합니다.
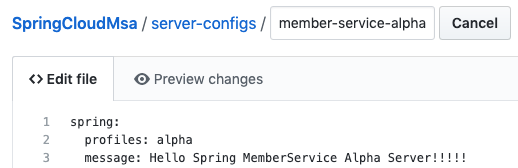
|
# contents-service-alpha.yml spring: profiles: alpha message: Hello Spring ContentsService Alpha Server!!!!! # member-service-alpha.yml spring: profiles: alpha message: Hello Spring MemberService Alpha Server!!!!! |
alpha 환경설정 확인
config 서버를 alpha환경으로 세팅( -Dspring.profiles.active=alpha )하고 재시작 합니다.

console에서 클라이언트 서비스의 설정값을 확인해봅니다. github의 설정 파일에서 정보를 읽어오는것을 확인할수 있습니다.
|
$ curl http://localhost:9000/member-service/alpha { "name": "member-service", "profiles": [ "alpha" ], "label": null, "version": "1dcee1575d90d4e1b51b34261f9118f366ee3204", "state": null, "propertySources": [ { "name": "https://github.com/codej99/Spring-Cloud-Msa/server-configs/member-service-alpha.yml", "source": { "spring.profiles": "alpha", "spring.message": "Hello Spring MemberService Alpha Server!!!!!" } } ] } $ curl http://localhost:9000/contents-service/alpha { "name": "contents-service", "profiles": [ "alpha" ], "label": null, "version": "6ec6f184c4e39d5fc56b4a819c6c03cd2f694482", "state": null, "propertySources": [ { "name": "https://github.com/codej99/Spring-Cloud-Msa/server-configs/contents-service-alpha.yml", "source": { "spring.profiles": "alpha", "spring.message": "Hello Spring ContentsService Alpha Server!!!!!" } } ] } |
Client Service에 alpha환경 추가
member-sevice, contents-service에 bootstrap-alpha.yml을 추가합니다. 서비스 둘다 내용은 동일합니다. 확인을 위해 서비스 profile을 alpha로 세팅( -Dspring.profiles.active=alpha ) 하고 재시작합니다.
|
spring: profiles: alpha cloud: config: uri: http://localhost:9000 fail-fast: true |
테스트
console에서 서비스 주소를 호출하여 alpha설정이 적용되었는지 확인합니다.
|
$ curl http://localhost:8080/v1/member/detail Member Detail - Port 8080 - Hello Spring MemberService Alpha Server!!!!! $ curl http://localhost:8081/v1/contents/detail Contents Detail - Port 8081 - Hello Spring ContentsService Alpha Server!!!!! |
설정값 실시간 변경 테스트
Config 서버를 따로 분리했는데 설정값을 실시간으로 변경할 수 없다면 아무런 의미가 없습니다. GitHub의 설정 파일 내용을 수정하고 커밋합니다.
|
# member-service-alpha.yml spring: profiles: alpha message: Hello Spring MemberService Alpha Server@@@@@ # contents-service-alpha.yml spring: profiles: alpha message: Welcome to Spring Api-02 Alpha Server##### |
다시 api를 호출하면 설정값은 변경하였지만 적용이 안된것을 확인할 수 있습니다. 왜냐하면 설정값은 변경시 바로 반영되지 않게 되어있습니다. 서비스에서는 서버실행시 한번 Config서버에서 설정을 읽어 로컬에 캐시합니다. 그후에 변경사항은 refresh를 호출해야 합니다. config서버에 부담을 주지 않기 위한 일종의 안전장치로 보입니다. 환경설정 변경 내용을 적용하기위해 타겟 서버에 POST로 actuator/refresh를 호출합니다. refresh 요청을 보내고 다시 테스트하면 이번에는 설정값이 변경되어 내려오는것을 확인할 수 있습니다.
|
$ curl http://localhost:8080/v1/member/detail Member Detail - Port 8080 - Hello Spring MemberService Alpha Server!!!!! $ curl -XPOST http://localhost:8080/actuator/refresh ["config.client.version","spring.message"] $ curl http://localhost:8080/v1/member/detail Member Detail - Port 8080 - Hello Spring MemberService Alpha Server@@@@@ $ curl http://localhost:8081/v1/contents/detail Contents Detail - Port 8081 - Hello Spring ContentsService Alpha Server!!!!! $ curl -XPOST http://localhost:8081/actuator/refresh ["config.client.version","spring.message"] $ curl http://localhost:8081/v1/contents/detail Contents Detail - Port 8081 - Hello Spring ContentsService Alpha Server##### |
실습한 소스의 최신내용은 아래 GitHub에서 확인 가능합니다.
https://github.com/codej99/SpringCloudMsa/tree/feature/config-server
[출처] https://daddyprogrammer.org/post/4347/spring-cloud-msa-configuration-server/
'SPRING > Spring Cloud MSA' 카테고리의 다른 글
| Spring Cloud MSA(3) – Service Discovery by Eureka (0) | 2020.02.18 |
|---|---|
| Spring Cloud MSA(2) – Gateway(Routing & Filter) Server by Netflix zuul (0) | 2020.02.18 |

